You’ve probably heard the term “Photoshop” before. You might even know that it’s a popular image editing program. But do you know how to use it?
Let’s start with some basics. Photoshop is a powerful tool for making changes to your images. It can be used for everything from cropping, enlarging, and shrinking photos, removing blemishes and changing colors on photos to creating 3D objects out of 2D images and much more!
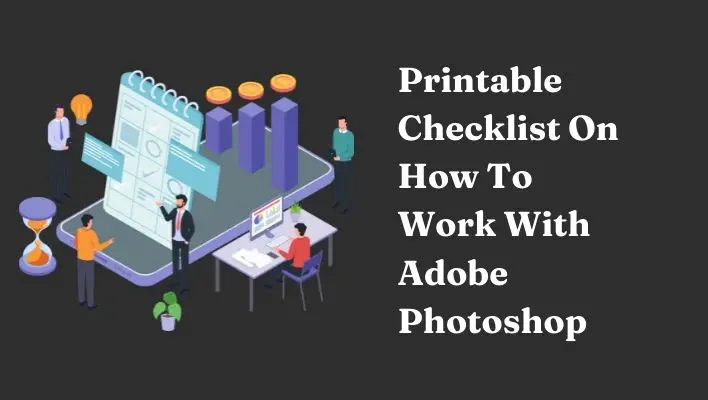
What makes Photoshop so powerful is its wide variety of tools that allow you to perform almost any task imaginable with a digital image or graphic (or two). In this free ebook, we’ll put together our top 13 tips on how to work with Adobe Photoshop yourself!
| Takeaways |
|---|
| – Using Adobe Photoshop effectively requires a clear workflow. |
| – Planning and organizing design projects can enhance efficiency. |
| – Familiarize yourself with Photoshop’s key tools and functions. |
| – Proper file management ensures easy access and collaboration. |
| – Regularly reviewing and refining your skills can lead to mastery. |
| – Utilize the provided printable checklist to stay on track. |
| – Experiment with different design techniques to enhance creativity. |
| – Continuously seek inspiration from other designers and resources. |
| – Keep learning and adapting to stay updated with Photoshop’s features. |
1. Opening Photoshop
Whether you’re a graphic designer or just want to tinker with your photos, Photoshop is an essential tool. Here’s how to open Photoshop:
The first thing you’ll notice when opening Photoshop is that there are several options available for opening the program. If you’ve installed it on your computer, click the “Photoshop” icon on your desktop or find it in the Applications folder (the folder where all of the apps on your computer are stored).
- In many ways, this is similar to other Adobe programs like Illustrator and InDesign but there are some key differences that make Photoshop stand out from its competition!
- Managing Documents Press Tab to write more…
- To create a new document, press Ctrl + N (Windows) or Command + N (Mac).
- To open an existing document, navigate to the location where your file is saved and double-click on it.
To save a document, select File > Save As… The Save As dialog box opens up so that you can choose where you want to save this file and what you want it named. You also have the option of saving over an existing file if there’s already one with that name in that location; just click Yes when asked if you want to overwrite it!
To close a document after working on it for a while: go back up to File > Close… and click Yes when asked if you want to save any changes made since opening this document last time (or No if not).
If there are unsaved changes in this window when closing out of Photoshop entirely, then clicking Cancel will exit without saving those changes!
Changing Document Size & Resolution: When choosing between different sizes when setting up new documents (such as 100% vs 150%), make sure that both dimensions match so things stay proportional (don’t use 200% resolution on a 300×100 canvas!).
For example, 200 x 100 is fine since both measurements add up perfectly while 250 x 150 would look lopsided because 250 is bigger than 150 but they’re not matching numbers like 25
When it comes to graphic design, Adobe Photoshop is a versatile tool that empowers designers to create stunning visual content. If you’re wondering how to make the most of Photoshop for your creative projects, check out our guide on working with Adobe Photoshop, complete with a handy printable checklist to keep you on track.
2. Layers
Layers are like sheets of transparent plastic. You can draw or add images to them, and then change the order in which they’re stacked one on top of the other. This allows you to move things around easily without having to worry about messing up what’s underneath.
When you create a new layer, you can name it whatever you want for example, “Background” or “Layer 1.” The layer is automatically named Layer 0 unless another layer already exists with a different name (e.g., L1).
In the layers palette, each new layer is added at the top but below any existing layers; therefore any changes made will not overwrite previous versions in case your Photoshop skills need some improvement!
Each time we create a new file (File > New), we automatically have 2 layers: Layer 0 and Background Copy these are both invisible by default so that nothing shows up until something is added onto them later down the line in our project workflow process when needed!
3. Zoom And Navigation
While working on projects, you will come across situations where you need to zoom in or out of your image. The easiest way to do this is by using the Zoom Tool.
The Zoom Tool is located on the left side of your screen (if you’re using a Mac). If you have trouble locating it, press “V” on your keyboard and then click with your mouse somewhere in the middle of the image canvas area.
The Zoom Tool allows for several different types of zooming:
Clicking once enlarges an area by 100%. This can be useful if you want to get a closer view of something specific in your photo; however, it doesn’t allow for much fine-tuning because everything else becomes pixelated and blurry.
Holding down Shift while clicking will enlarge an area by 200%. This is great when trying to see small details that were hard to see before without sacrificing quality too much but still having enough visibility over larger parts such as faces or body parts if needed during editing sessions later down the road when creating anything from photoshoots/portraits etc…
Designing leaflets for restaurants requires a blend of creativity and practicality. Whether you’re a seasoned designer or just starting, our article on designing a leaflet for a restaurant offers insights and tips to create eye-catching and informative materials that capture the essence of dining experiences.
4. Brushes
Brushes are the main way you can use your Photoshop skills to create anything from a wound on an arm to streaks of light in the sky. They’re not just for digital art either! You can print them out and use them for doodles or any other project that requires brush strokes.
To begin using brushes, open up Adobe Photoshop and then go to ‘File’ on top (or hit Ctrl + N). From there, click on ‘New’. For this tutorial, we’ll be working with pixels so make sure you choose ‘RGB Color’.
Now let’s get started by choosing a size for our brush! The first thing we want to do is change the size of our brush we’ll do this by clicking on one of these little arrows. To change color all we have to do is click once in one of these boxes where it says ‘Color’.
We can also adjust opacity here too if needed; simply drag up or down until the desired effect has been reached!
5. Filters
- Filters are effects that can be applied to images.
- Filters are found under the Filter menu, which you will find in the top menu bar of Photoshop.
There are many different filters that you can apply to your image, including:
- Sharpen (which increases contrast)
- Blur (which softens focus)
- Distort (which changes perspective)
You can also apply this effect on a single layer or across all layers in an image.
6. Selections
Selections: You can use selections to cut or copy different parts of your image.
Magic Wand Tool: The magic wand tool selects similar colors in an image.
Quick Selection Tool: This tool is used to select areas that are similar in tone or color to a sample area you have clicked on.
Lasso Tool: The lasso tool lets you draw freeform selections around the objects you want to select with the mouse button held down and then once the selection loop is closed, clicking again will add it to your current selection set so long as it’s within tolerance range (which you set).
7. Color Management
Color groups are the colors you choose to be used in your document. You can select one of these colors and make it the foreground color so that all of the other colors on your canvas will be different shades of this chosen color. This is helpful for creating patterns, such as stripes or plaids.
To pick a color using an eyedropper tool click anywhere on your screen with it until you get to a spot where there’s a good amount of contrast between two different colors (for instance: black vs white).
Once you find this spot, click once and then drag across until the whole area has been selected (the entire area should turn into a gradient). Then just click OK and that’s all there is to it!
Mobile app icons play a crucial role in user engagement and brand recognition. Crafting effective app icons involves careful consideration of design principles. Learn how to design captivating icons for mobile applications with our step-by-step guide: designing app icons for mobile devices.
8. Type Tool
The Type tool lets you add text to your document. You can use it to create headlines, titles, body text, and more.
To use the Type tool, select the T from the toolbar or press T on your keyboard. Then click anywhere in your document where you want to start typing. After that’s done, use one of these options to type:
Click somewhere else on the page and begin typing again (you’ll be adding another paragraph).
Press Enter or Return on your keyboard this will add a line break character at that point in time. If you’re typing in all caps with spaces between words as well as after periods (or other punctuation).
Then this command will change it back into a regular sentence case where capitalization only happens at sentence beginnings and proper nouns only get capitalized within sentences otherwise they remain lowercase; if not…
9. Blending Modes And Opacity
One of the best things about Photoshop is its versatility. You can change blending modes and opacity to get different effects. For example, you can use a layer with a light blue background and white text in it.
The layer will blend into your image so that the text becomes translucent. This creates an interesting effect that looks good on some images but would not work well on others.
Blending modes are very useful when working with layers because they allow you to create more subtle changes than opacity does by default.
Opacity is great for making sure that certain parts of your work don’t show up too much or too little but if you want something more dramatic, then these options are what you need!
10. Transformations, Flipping And Rotating
The Transform commands in Photoshop are also available from the Image menu. The following steps will show you how to apply these commands:
- From the File menu, choose Open.
- In the Open dialog box, navigate to where you want to find your image and select it for opening (or drag-and-drop it into Photoshop).
- After opening your image in Photoshop, go back to the File menu and choose Save As…
11. Image Cropping And Resizing
Cropping is the removal of unnecessary portions from an image. Cropping can be done with the crop tool, a marquee tool, or a slice tool. The slice select tool is also used for cropping images.
In addition to these tools that are native to Photoshop, there are other ways of cropping images:
Magic wand selection tool (used for selecting areas), lasso selection tool (for free-form selections), polygonal lasso (for making straight-edged selections), quick selection brush (used for easily making areas ready for editing), color fill blending mode, and shape blending mode (which will be discussed later).
Creating a logo is an art that requires a blend of skill and inspiration. If you’re looking to design an illustrated logo that speaks volumes about your brand, check out our tutorial on creating a simple illustrated logo in 1-2 hours. Discover techniques that can help you produce a memorable and impactful logo.
12. Image Slicing And Image Maps
Image Maps: An image map is a way of linking different areas of your image to different pages on a website. It allows you to create clickable areas on your graphic without having to add any additional text or buttons.
Slice Tool: The slice tool is used to define slices in an image. Slices are used as hotspots for web graphics and help allow users to navigate between pages on a website.
They also provide a way for web developers to organize images and apply changes quickly using CSS code instead of having to manually edit each individual image file, saving time while allowing more flexibility with changing colors and adding effects like shadowing later down the road if needed without having re-designing everything over again!
13. Text Selection, Pen Tool, And Paths
A path is a series of points joined by lines. When you create a path in Photoshop, you’re actually drawing a line around an object. The pen tool is used for creating paths, which can then be used to select areas within your image and apply effects such as brushes or filters.
Here’s how it works: Say you want to select the water bottle in this image. You could use the magnetic lasso tool and draw around it (which would take longer than necessary), or simply use the pen tool on its own layer without selecting any background pixels (a faster move).
In fact, if there are no other objects around your subject that overlap with it like in this example creating paths will be faster than using any other selection tools because there won’t be any need for editing afterward!
Embarking on a freelance design journey can be both rewarding and challenging. If you’re considering a similar path, explore the experiences and insights shared in our article: How I Became a Freelance Designer and Earn 15k After College in Six Months. Discover how one designer navigated the transition from college to a successful freelance career.
Conclusion
The above is a checklist that will help you to get the most out of Adobe Photoshop. We hope that it has been helpful for you, and we wish you all the best in your creative endeavors!
Further Reading
Explore these resources for further insights into working with Adobe Photoshop:
Enhancv’s Guide to Photoshop Skills: Improve your Photoshop skills with valuable tips and techniques to enhance your design projects.
Adobe Photoshop Tutorial: Dive into a comprehensive tutorial that covers various aspects of Adobe Photoshop, from basics to advanced techniques.
Creating Printables in Photoshop: Learn how to create engaging printables using Photoshop through this instructional course.
FAQs
Have questions about working with Adobe Photoshop? We’ve got you covered:
What are some essential Photoshop skills for designers?
Mastering essential Photoshop skills, such as layers, masking, and selection tools, is crucial for designers to create professional-quality graphics and visuals.
Where can I find tutorials for Adobe Photoshop?
You can find a variety of tutorials for Adobe Photoshop on platforms like YouTube, design blogs, and dedicated tutorial websites.
How can I create printables using Photoshop?
Creating printables in Photoshop involves designing templates for various printable materials like planners, worksheets, and more. Check out tutorials or online courses to learn the process.
Are there resources to help me improve my Photoshop skills for resume building?
Yes, there are resources available, like online guides and tutorials, that can help you improve your Photoshop skills specifically for enhancing your resume’s visual appeal.
Can Photoshop be used for digital marketing purposes?
Absolutely! Photoshop is widely used in digital marketing to create eye-catching graphics, banners, social media posts, and other visual content that engage audiences and promote brands.
How Do I Open An Existing Photoshop Document?
To open a Photoshop document, just click on the Open button in the File menu. This will bring up a file dialog box where you can navigate to and select your file. After that, simply click “Open” to load it into Photoshop.
How Do I Change The Size Of The Canvas?
You can change your canvas size by going to File > Canvas Size… or by pressing Ctrl + Alt + C (Windows) or Command + Option + C (Mac). This will bring up a dialog box with several options for resizing your canvas.
Select “Relative” from the dropdown and then enter your preferred dimensions (in pixels) in both the Width and Height fields before clicking OK.
If this doesn’t work as expected, try going through Preferences and changing “Image Interpolation” mode from “Nearest Neighbor” to “Bilinear” is available for better quality image resizing.*
What Is Photoshop?
Photoshop is software used for editing images. It’s mostly used for digital photographs, but it can also be used for creating vector graphics and raster graphics.
Is There A Difference Between Raster And Vector Graphics?
Yes, both types of graphics have different qualities. Raster is made up of pixels that make up an image, while vector is built using geometric shapes that define paths instead of pixels.
This means they can be scaled without losing quality due to the fact that they aren’t made up of real-life objects–they’re just algorithms describing how those objects would look if they were there in 3D space (like a rectangle defining where your nose should be).
Conclusion
So you’ve made it to the end of this guide. I hope it was helpful and that you got some useful information from it!

Costantine Edward is a digital marketing expert, freelance writer, and entrepreneur who helps people attain financial freedom. I’ve been working in marketing since I was 18 years old and have managed to build a successful career doing what I love.