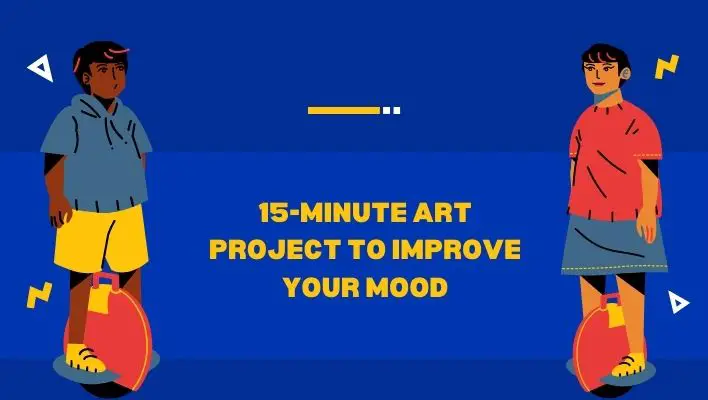
If you’re feeling stressed, stuck, or just in need of a bit of pick-me-up, it may be time to get out the art supplies. Making art has been shown to have a lot of benefits for both mental and physical health. Research suggests that just 45 minutes of art therapy can reduce stress levels.
So if you’ve had a rough day at work, or are dealing with any other kind of stressor, why not try an art project? There’s no need to buy expensive supplies or spend a lot of time on this in fact, we’ll show you some super quick projects that you can finish in 15 minutes or less!
The idea here is not so much to create “masterpieces” as it is to calm your mind. So we encourage:
- Use whatever materials you have lying around; go nuts with old magazines and newspapers;
- Be as messy as you want: much like when we were kids playing in mud puddles and finger paint, there’s something therapeutic about making messes! Let go! Don’t worry about whether what you produce looks any good the process is more important than the result.;
- Try several different types of projects: who knows what will catch your creative fancy?.
We’ve included simple projects for inspiration but feel free to change things up and make them your own.
| Takeaways |
|---|
| 1. Engaging in a short art project can have a positive impact on your mood. |
| 2. Artistic self-expression allows for emotional release and stress reduction. |
| 3. Taking just 15 minutes for creativity can boost your overall well-being. |
| 4. Art projects provide an avenue for mindfulness and living in the present moment. |
| 5. Experimenting with different materials and techniques can spark creativity and joy. |
Stenciled Labels
- Make the stencil. You can use any kind of paper for this project, but I recommend using something thicker than printer paper and something you don’t mind getting paint on. To create your stencil, draw freehand shapes with a pencil onto the backside of your chosen paper and then cut them out with an X-ACTO knife or craft knife.
For some added interest and texture, add little doodles or drawings to the front side before you trace over them with a pencil again. Or if you’re feeling lazy like me today, use some adhesive tape to attach a pre-cut shape from your collection of found objects (old stamps, printed photos) onto your chosen substrate instead!
- Paint away! Use whatever kind of paintbrush that feels good in your hand: small ones give more precise control over detailed areas like letters; big ones are great for covering large areas quickly once those details have been painted first by hand using smaller brushes (you could even combine these two methods by using one brush between each letter).
Understanding customer needs is vital for business success. Learn how to gain the clearest insight into your customers’ desires by following our guide on getting a clear picture of customer needs.
Hanging Washi Tape Cubbies
Washi tape is a super trendy craft supply that’s been around for decades in Japan. It’s made of thin paper-like material and comes in a variety of colors, patterns, and widths.
You can use washi tape to cover up the cracks in your walls or decorate just about anything you want. Washi tape cubbies are the perfect place to store all those little rolls of washi tape you’ve been collecting. They’re also great for keeping other craft supplies organized too! This DIY project will only take 15 minutes (plus drying time).
Painted Wooden Peg People
Next up, we have our painted wooden peg people. These are super easy to make and take only a couple of minutes per figure. What you will need:
- Wooden pegs (I purchased mine at Michael’s for about $2)
- Acrylic paints in various colors (a package of 12 costs around $3)
- Paintbrushes (you can find these at any craft store or online)
How to do it:
- Paint your peg people in the colors of your choice and let them dry thoroughly before moving on with the next step. If you’re using spray paint, make sure that they’re covered with newspaper so that they don’t get splattered while drying!
Elevating your marketing strategy is key to attracting and retaining customers. Explore our comprehensive 23-step checklist for marketing improvement to enhance your marketing efforts effectively.
A Colorful Suitcase Nightstand
If you’re looking for an easy way to add color to your space and make your nightstand something special, take a look at this project.
You can use any suitcase that’s not being used anymore, then paint it or cover it with wallpaper. It’s also nice to have a handle on the side of the suitcase so it’s easier to move around when needed. If you want a more unique look from your nightstand, try this fun idea!
Cuttings-Stuffed Mason Jars
What you will need:
- Mason jars
- A variety of plants and flowers that you want to cut, or buy these at the store if you don’t have a garden.
How to do it:
- Cut your flowers from the plant and place them in the jar, leaving a little breathing room at the top depending on how full you want your flower arrangement to be. You can use different colored blooms as well!
- Pour water into each jar until it covers all of your flowers by about an inch or so, then close tightly with a lid (if not already closed). If there is too much water in one jar compared to another, simply add some more soil until they are both equalized again (this will make sure everything stays moist).
Watercolor Drop Cloth Artwork
You can create this watercolor drop cloth artwork in just 15 minutes. It’s a great way to help you get through your day and feel better about yourself because it makes you feel like you’ve accomplished something.
To make this project, all you need is some watercolor paper, which is available at most craft stores or online if they don’t carry it where you live. You can also use canvas paper if that’s what they have available at the store.
The next step involves cutting out small squares of different colors and arranging them on top of each other in any way that appeals to you visually (for example blue on top of green). Make sure each square has some white space around it so that when they’re hung up they’ll look like drops falling from above down onto your wall/ceiling/floor/table/etcetera!
Once all your squares have been cut out and arranged however it looks best for them (this is called “painting by numbers” because there will be numbers written on each square), take some twine or rope and tie together two corners from opposite sides until only one corner remains open; then tie those two remaining corners together as well!
This will create an X shape across both sides of your painting but don’t worry about that now because we’re going focus on hanging these up instead…
Crafting effective marketing questions can lead to valuable insights. Check out our guide on asking strategic questions for effective marketing to learn how to gather actionable data from your audience.
Anthropologie-Inspired Feather Wreath
A feather wreath is a beautiful home decor piece that can serve as an excellent accent in any room. If you’re looking for a quick, easy craft project to get your creative juices flowing, take some time today and make one with these simple steps! Materials needed: feathers, wire hanger (or wire), scissors, glue gun, or hot glue sticks (optional).
Cyanotype Headboard Artwork
Cyanotype headboard artwork is a fun way to add a pop of color to your bedroom. It’s also great for the kids’ room, or even as an accent piece in a playroom.
Cut out your pattern and trace it onto the back of your fabric using chalk. If you can’t find a pattern you like, feel free to make up your own!
Iron on transfer paper over the traced image and iron again until clear lines appear. This will ensure that all of the ink transfers onto the fabric by adhering only to it, leaving everything else alone (and keeping them from getting stained). You can use any transfer paper that works with transparencies I used the Canson brand when I made mine!
Ombre Wire Bowls
Materials Needed:
- 3/16″ or smaller wire (you can use any type of metal wire, but we found that copper is the easiest to work with and looks the nicest)
- wire cutters
- pliers (optional)
- paintbrushes (for applying paint, acrylic sealant, and clear spray sealant)
- acrylic sealant and clear spray sealant (the sealants will make your bowls durable enough to hold food)
If you want to make a square bowl rather than a round one, you’ll need some scrap wood or cardboard. You can also use other shapes like triangles or hexagons!
Framed Vintage Silverware Wall Art
With a little imagination, your silverware can be transformed into an art piece. This project is perfect for those who are looking to add some fun and whimsy to their home decor. You can create this wall art in just 15 minutes. Supplies:
- Shadowbox (here’s a good one)
- The vintage frame (this one is on sale)
- Piece of lace or fabric (this will cover the back of your shadow box)
- Ribbon, twine, or yarn (#1-#4 would work best for this project)
Utilizing innovative tools like bingo cards can revolutionize your marketing research. Discover how to harness the power of bingo cards as a marketing research tool in our article on leveraging bingo cards for market research.
Book Page Branch Shadow Boxes
If you have a collection of small items that need to be displayed, use a shadow box to do so. To make this project, cut out a frame from a branch.
Cover the back and sides with book pages. Glue these in place so that they overlap slightly, creating an effect where you can see through them but they still create enough of an edge for your shadow box to stand up on its own.
Add an opening for your mirror or tray by cutting out two pieces of cardboard and nailing them together at right angles (make sure they are perfectly square). Place on top of your book page background and glue in place.
Painted Striped Vases With Freehand Flowers
- Paint the stripes on your vase with a paintbrush.
- Make sure to use a tape measure to make sure that the stripes are the same width, and use a ruler to draw straight lines on them.
- Use a pencil or pen to mark where you want the stripes to go, then use it as a guide for painting! You can also make sure they’re straight by using string or even ribbon as an extra guide if needed.
- When you’re done with all of your stripes, wipe off any excess paint with a sponge so that none of it drips onto your table or floor while you’re working! The point is for these projects to be fun not stressful!
Yarn Pom-Pom Letter Garland
Materials:
- Yarn (one skein will make two garlands)
- Pom-pom maker or you can make them by hand like this.
- Scissors
Steps: 1. Make one pom-pom for each letter of your word or phrase. 2. Cut the letters out of felt and arrange them on top of your yarn pom-poms to spell out words or phrases in whatever design you want! 3. Hang up your new garland in any room that needs some extra cheer!
DIY Monogrammed Door Mat
You can create your personalized doormat with either paint or fabric, but the main thing to keep in mind is that the design will be hanging off of your front door. This means that it needs to be something that you’ll love looking at every time you go outside.
For example, if you use paint, try going for something large and bold that stands out against any backdrop. If you’re going with fabric, choose a solid color so it won’t get lost under plants or table settings. It’s up to you whether you want to DIY this project yourself or buy one at a craft store; either way, it’ll look beautiful when done!
Twisted Twine Vases
Twisting twine is a great way to use up leftover twine, as it doesn’t take much time or effort. You can use them for flowers and other decorations, or just as shapes. They’re very versatile and easy to make!
They are also very cheap to make since you’re using something free – the twine itself! The only supplies needed are a large paper clip (or two) and some tape (along with scissors). They can be made in any color and any size, so you can customize them however you want!
Conducting market research doesn’t have to break the bank. Learn the art of conducting effective market research without spending a dime with our guide on free market research strategies.
Final Thoughts
We hope you enjoyed our carnival of art and craft ideas! We’ve tried to cover a variety of different moods, so hopefully, there was something for everyone. As we said before, don’t be afraid to use your free time creatively. Take some time away from the screen, find an activity that speaks to you, and have fun.
Further Reading
The Power of Art Therapy: Discover the transformative effects of art therapy and how it can enhance emotional well-being.
10 Art Therapy Exercises to Elevate Your Mood: Explore a collection of art therapy exercises designed to uplift your mood and promote self-expression.
Boost Your Mood with 15 Art Therapy Activities: Dive into a variety of art therapy activities that have the potential to boost your mood and enhance your creativity.
People Also Ask
What Is The 15-Minute Art Project?
The 15-Minute Art Project is a series of activities designed to help you improve your mood and feel more confident, empowered, and engaged in your life.
It’s based on the theory that when we’re feeling low or stuck, it’s because we’re not using our creative minds and if we can get into that space, then we can find inspiration and new ways of thinking about things. This project will help you tap into your creativity so that you can see what’s possible for yourself!
How Do I Know If This Is Right For Me?
If you’ve ever enjoyed creating something (whether it was a craft, a piece of writing, or anything else), then this project is probably right for you. The main thing is just to make sure that your mind isn’t so full of other stuff that it would be hard to focus on this exercise. You can always try it out first and then decide whether or not it works for you later on down the line.
Can I Use This Art Project With My Students?
Absolutely! This project is a great way to encourage your students to work on their own or in pairs. You can set them up at different stations and let them go at it, or you can assign an activity for each student, like drawing or painting a picture of themselves for five minutes, then writing about how they felt during that time.
Can I Do This Project If I’m Not An Artist?
Yes! You don’t have to be an artist, or even know how to draw, to get the benefits of this project. All you need is a willingness to try something new and open yourself up to the experience. If you’re not sure where to start, here are some ideas:
-Draw or paint with your non-dominant hand.
-Use a different medium than you usually use (for example, paint on paper instead of canvas).
-Draw something meaningful to you, rather than trying to copy someone else’s work.
Is There A Way To Improve My Mood That Doesn’t Involve Taking Medication Or Going To Therapy?
Yes! There are a lot of ways to improve your mood without anything more than a pencil, some paper, and a few minutes of your time. Here are some of our favorite ways:
Draw something. You don’t have to be an artist or even good at drawing. Just pick up a pencil and draw something anything! It could be a face, or maybe just the shape of something in your environment (like the moon). Whatever you choose to draw will help you feel better!
Write something down. When you’re feeling down, writing down what’s bothering you can help you feel better because it gives you a chance to get all that stuff out of your head and onto paper where it won’t bother you anymore! And if it does bother you after that? Well then at least now it’s on paper instead of just floating around in there somewhere.
Make something from scratch. Whether it’s making dinner from scratch or knitting yourself a brand new scarf (and maybe even knitting yourself another one), making something by hand not only keeps your brain busy with creative tasks but also makes things come into being which has been shown.

Costantine Edward is a digital marketing expert, freelance writer, and entrepreneur who helps people attain financial freedom. I’ve been working in marketing since I was 18 years old and have managed to build a successful career doing what I love.